
Hey JUNIOR SPROUTS!!! It’s time for….
Mrs. Backman’s “Elementary Kid’s Craft Challenge”

Here’s a fun & easy art project, that is a favorite for all ages! Included below are directions for a folding picture-board & stand, but these also make great cards, ornaments or stand-alone art, and more!!
There are so many ways to embellish & apply the project basics, detailed in this article. So use your imagination & get creative! Great for all occasions, holidays & gifts!!
*This project is recommended for ages 6 and older.
WHAT YOU WILL NEED:
- Black construction paper
- sheet of cardboard
- pencil
- a water-soluble, liquid, PVA glue (Elmer’s, Mod Podge, or other school glue)
- old paint brush
- scissors
- craft glitter
*OPTIONAL ART SUPLLIES:
- colored pencils, crayons, pastels, acrylic paint.
- sequins
- felt fabric sheets
- googly eyes
- craft tissue paper
- chenille stems (pipe cleaners)
- ribbons
HERE’S the HOW-TO:
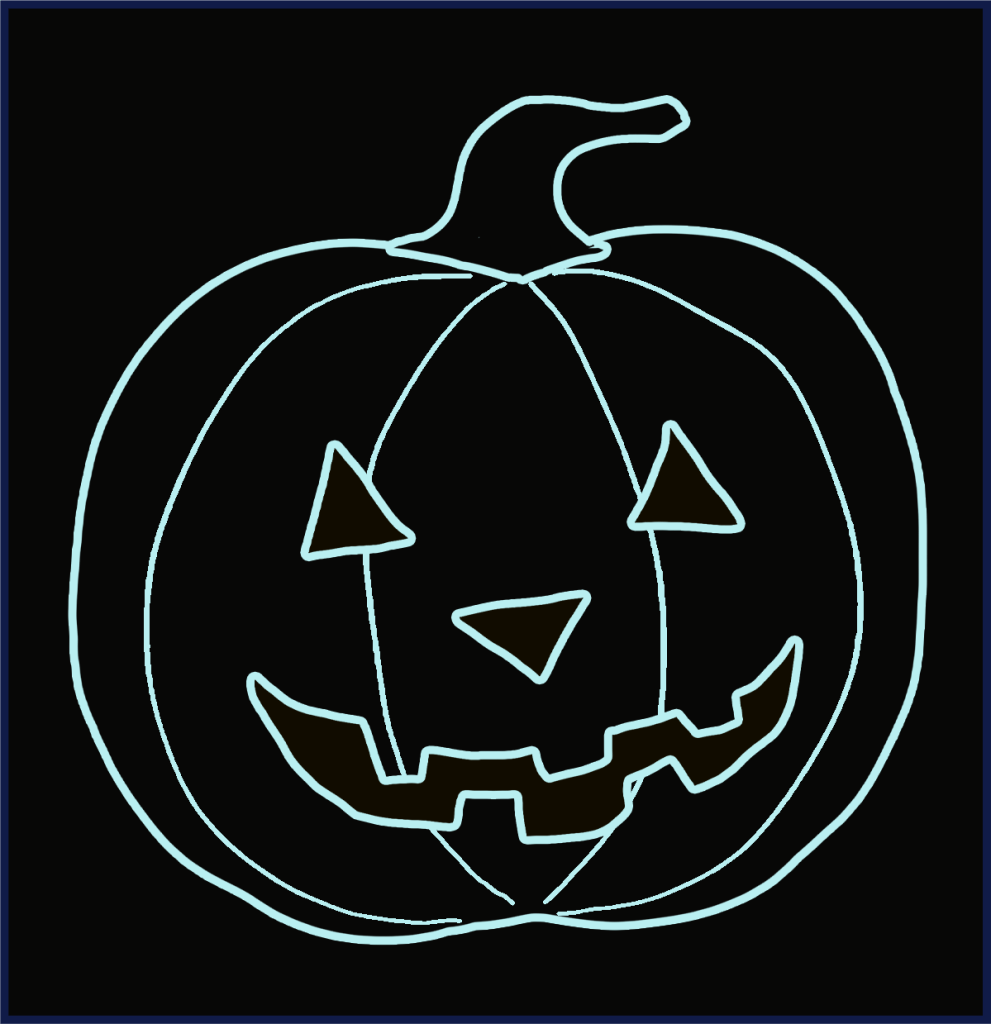
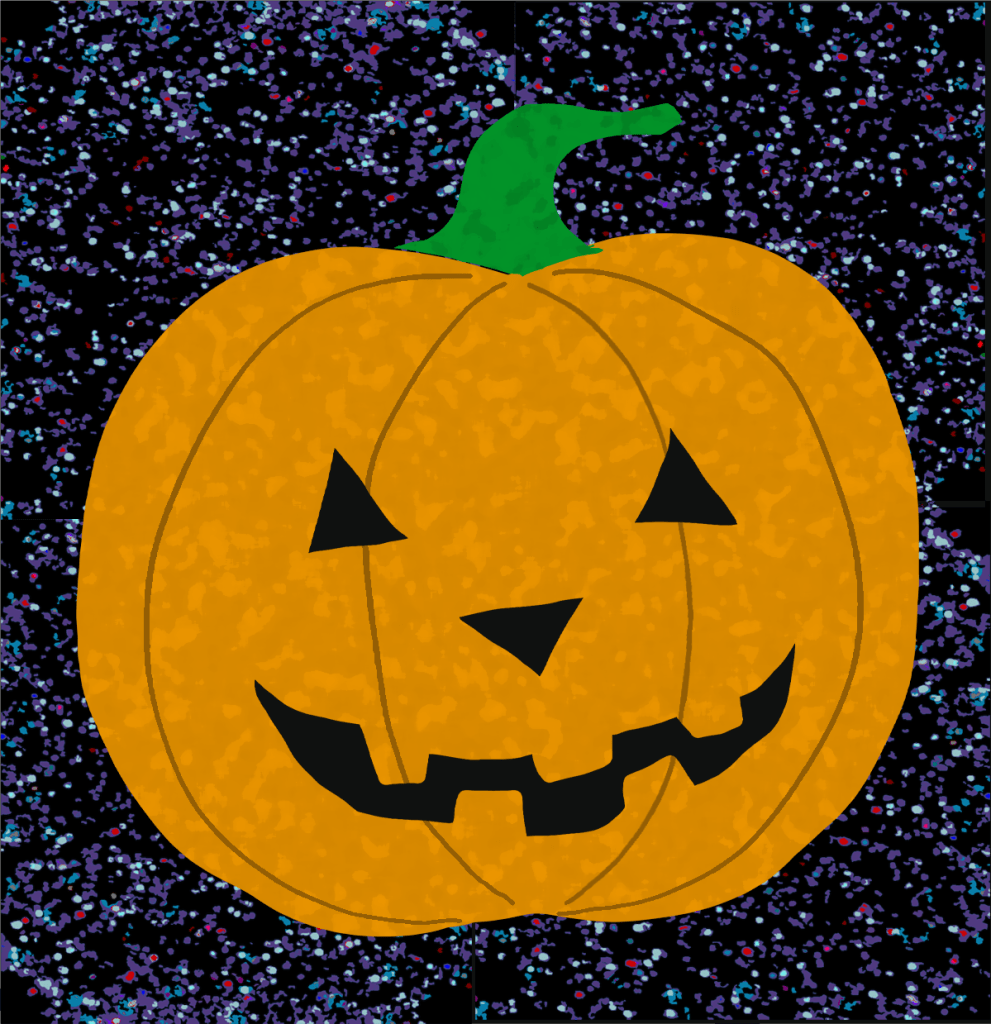
For this project, we will be making a simple glitter jack-o-lantern, using colored pencils, but any of the optional art supplies, listed above, can be used in all kinds of creative ways! For example, colored craft tissue paper, when twisted at the ends and lightly crumpled, make great 3-D pumpkin leaves, felt can be used for the jack-o-lantern’s eyes & mouth, or a moon & bats, in the background. Added on to top of a glitter layer, certain parts of the card can be painted while other parts are glittered, etc.
STEP 1: Getting your basic image down.
- Cut a 5″ inch x 5″ inch piece of black construction paper.
- Using a regular pencil, sketch out your picture. You can either a.) use a light touch, with a darker pencil, so that your image is only visible enough to serve as guidelines, for what to paint and what the glitter, but won’t show through the glitter, or b.) use lots of colored pencils to decorate parts (or all) of your picture.
- Pastels, crayons and paint are other great options.

STEP 2: Glittering your image.
- Apply glue only to the areas where you want glitter.
- For large areas, use an old paint brush, to brush a light coat of “school glue”.
- For adding more detailed lines, such as glitter highlights, on top of a painted image, school glue containers with a pen-point style distributor cap works great for drawing in your soon-to-be glittered lines.
- When using multiple colors of glitter, do only one color at a time, and allow the glue to dry before adding your next color.
- Once your glue is down, lightly sprinkle glitter onto your picture. Some glitters come in a salt-shaker style container, which work fine for large areas, but for smaller detail, or for better maintaining separation from other glitter colors, I recommend using your fingers, taking your time, sprinkling a bit closer to your image. Start with your background layers first, and more detailed, highlights and foreground layers last.
- For better glitter adherence, you can lightly tamp or blow your layer a bit more into the glue.
- Once your glue has dried, be sure to turn your image upside down, and shake off any loose glitter, after each layer application.

STEP 3: Assembling your picture board w/ folding stand.
- Cut a 5″ inch x 5″ inch piece of cardboard, to glue your artwork to.
- Cut a 10″ inch x 2.5″ inch strip of cardboard, to make a folding triangle stand.
- Fold your 10″ x 2.5″ strip into four equal sections (2.5″ x 2.5″ each). These should fold into a triangle, with the two end sections overlapping, on the bottom.
- At the top section of your strip, measure 1.25″ down from the top, then using scissors, on the right side of the strip, cut a 1.25″ horizontal notch towards the center of the section. This will be Tab “A”.
- Rotate your strip upside down, and repeat the same step as above, to create Tab “B”. This should give two horizontal notches at each end section, one from the right towards center, and one from the left towards center, as shown in the diagram.
- Fold the strip into a triangle, with these two end sections overlapping, on the bottom.
- By feeding the two end notches of Tab “A” and Tab “B” into one another, so that each tab are now on the inside of the triangle, you create an interlocking stand, for your picture board.
- When you are ready to put your Halloween ornament away, until next year, the tabs simply unlock, and your stand folds flat, against your picture board, for easy storage!
- The 2nd (2.5″ x 2.5″) section up, from the bottom of the strip (tab “B”), is “Glue Point 1”. This section is glued to “Glue Point 2”, located on bottom center of the back of your picture board.
- Before glueing your stand to your picture board, be sure to check to make sure your image, on the other side, has the right side up.

STEP 4: Attaching your artwork to your picture-board.
- Using a brush, spread a light, even coat of glue to the front of your picture-board. Be sure to cover the entire surface.
- Place your artwork onto the glued surface.
- Cover your artwork with a sheet of paper.
- Starting from the center, gently smooth over the surface of the cover, to get a good, even, wrinkle-free bond of your artwork to the picture-board.
STEP 5: Finishing touches.
- With the stand flat against the picture-board, apply any additional touches, such as paper leaves, ribbon, googly eyes, and such.
- Assemble the triangle stand and display!!
Bonus Itty-Bitty, Batty Buddies
That’s right, Junior Sprouts!! An extra Halloween craft project challenge!! This project is recommended for ages 8 and older, due to the use of a hot-glue gun.

WHAT YOU WILL NEED:
- Black felt fabric sheet
- white pencil or chalk
- scissors
- tweezers
- hot-glue gun
- Pom-poms
- googly eyes
- chenille pipe cleaners *(optional)
These are another fun & easy kid’s craft, that can be used in a number of creative ways. Here are some examples.
- Hair clip: hot-glue the back of a hair-clip to the back of your bat, then cover over the back of the clip with a round piece of felt that is the same size as it’s round torso, and glue to the clip & back of your bat.
- Halloween pin: same steps as above, only using a safety-pin. Recycling old, slightly smaller, round lapel pins works great too! Just glue ’em right over the front of your pin.
- Wristband & headband: Ribbons, and strips of felt, with a button sewn on the end, make great bands to attach your bat to.
- Refrigerator magnet: just glue a magnet to the back of your bat.
- Halloween ornament: Hot-glueing a colorful chenille stem (pipe cleaner) to the back of your bat, allows you tons of great ways to hang, attach, stand upright, and display your ornament.
- 3-D Picture-board: simply glue to the front of a painted & glittered picture.
HERE’S the HOW-TO:
- Fold a sheet of black felt fabric, in half.
- With a white pencil or chalk, draw an outline, as shown in the diagram below, from the folded edge of the fabric.
- Using good scissors, cut along your chalk line, then unfold your fabric to reveal two symmetrical bat wings, ears, and center, round base to glue your pom-pom body to.
- I am using a 2 inch pom-pom for the body, so my sketched, half of a bat outline should be approximately twice as wide (4″ inches) & slightly taller, for the added height of the ears (approximately 2.5 inches).

- Hot-glue a large 2″ inch purple pom-pom to the felt center round, between the wings.
- Using a pair of tweezers, hot-glue googly eyes to the pom-pom.
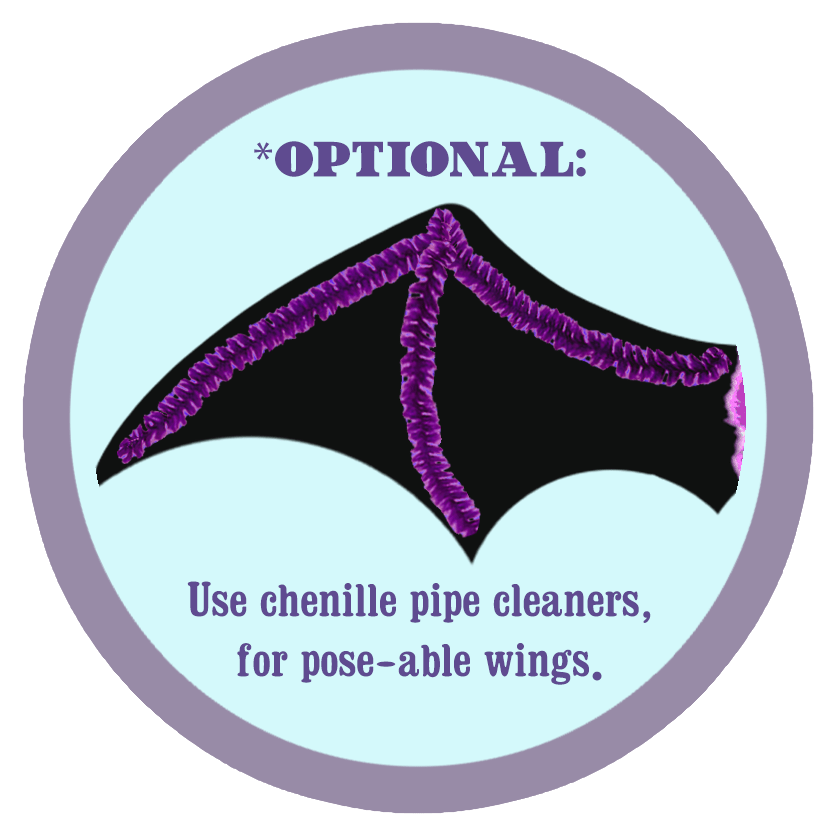
*OPTIONAL: For poseable wings, black or purple pipe cleaners can be added. Simply cut the needed lengths of pipe cleaner, bend them to the contours of your felt bat wings, then glue in place.
Also can be used for feet, ornament hook, stand, or wrap-around.

That’s it, Junior Sprouts! It’s just that easy!! Good luck, creative crafting!! and…
Happy Halloween!!!
*This article was written by Eddie Strange, October 20th, 2023.

About Mrs. Backman:
Georgia Backman is “Hearth & Home Herald’s” early-childhood education consultant & kid’s crafts connoisseur.
An elementary school teacher for 25yrs. at Whittier Elementary School, Georgia received her undergraduate degree from Central Washington University, and graduate work at Seattle Pacific University.
Georgia and husband, Chris Backman, both grew up in the Magnolia neighborhood of Seattle, WA, where they reside today.
Georgia’s other passions include her family, dogs, skiing, and boating.

0 comments on “Glitter Pumpkin Project for Halloween”